In frontend development, navigating through scenarios where the data we need from HTTP requests isn’t readily available or is still in transit on the backend is quite common. Additionally, ensuring our applications behave as expected when dealing with various backend responses, such as errors or differing data versions, can pose challenges due to specific circumstances, race conditions, or limited access permissions.
At times, we find ourselves in a position where we simply need to showcase how our application should react based on these backend responses. While one solution might involve hardcoding different responses directly into the codebase, this approach isn’t optimal as it implies altering the code solely for testing purposes.
Alternatively, we could leverage tools like Postman, which offers the capability to generate mock servers featuring tailored responses for specific requests. However, this method entails updating the application’s URL configuration and might come with constraints on the number of requests permitted in its free version.
Given these hurdles, it’s smart to seek a solution that facilitates easy configuration and simulation of custom responses, encompassing the anticipated payload object, while also offering the flexibility to replicate configurations for testing diverse scenarios.
In this tutorial series we’ll go over some alternatives that address these needs, offering seamless configuration and simulation of custom responses for front-end testing and development. We’ve already covered the Tweak extension in our first post, but today we’ll explore local overrides.
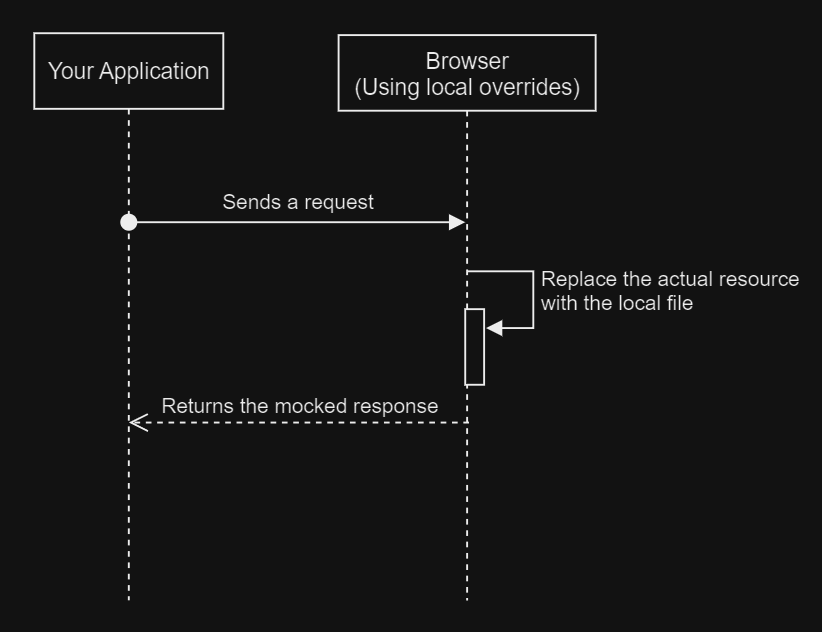
Using browser local overrides
There is another alternative, using local overrides (works in Chromium-based browsers).
More information here: https://developer.chrome.com/docs/devtools/overrides?hl=en.
It’s a similar process:
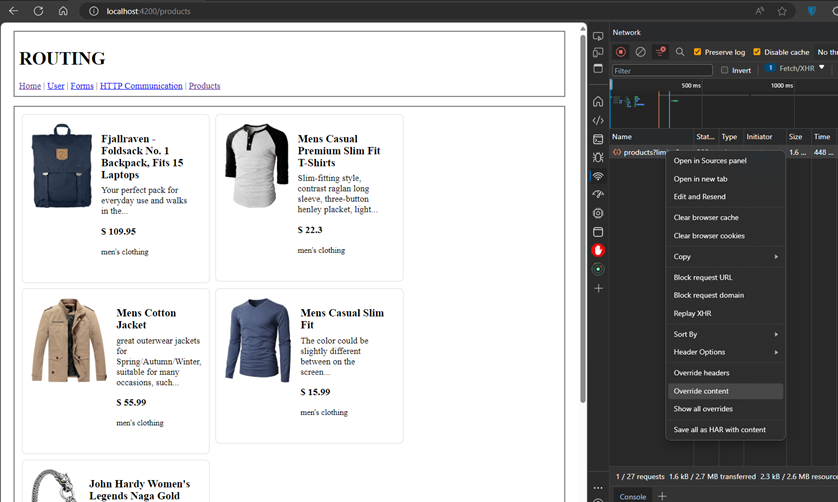
1. First, we need to load the application with the default request, then right-click on that request and select Override content:
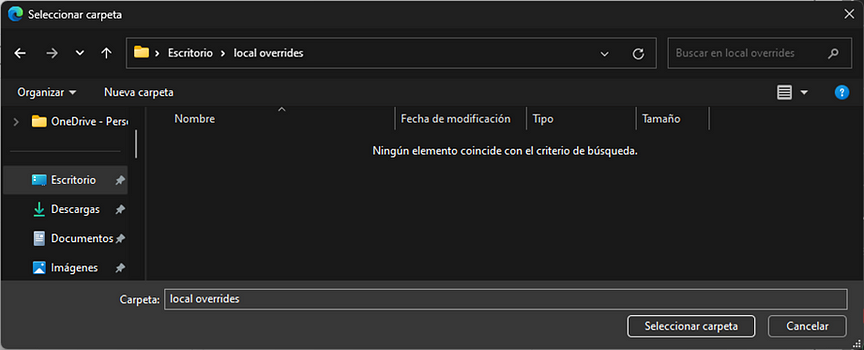
2. It will open a prompt asking for the folder to save the overrides:

3. Select any folder in your system:
4. Then the browser will ask for permission to access that folder. Click Allow:

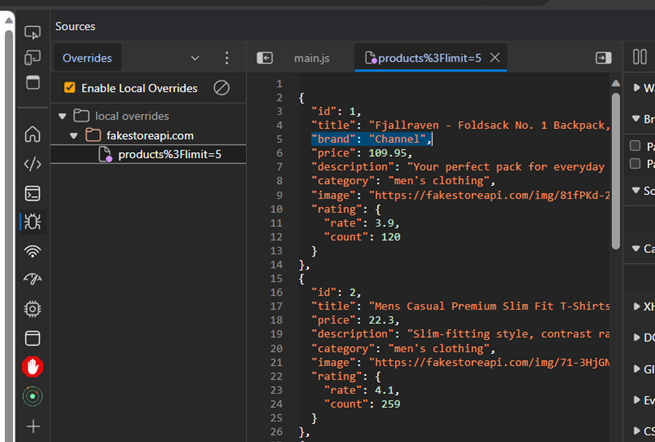
5. Once that is allowed, you will see the overrides tab in the browser developer tools. You can also navigate through Sources -> Overrides:
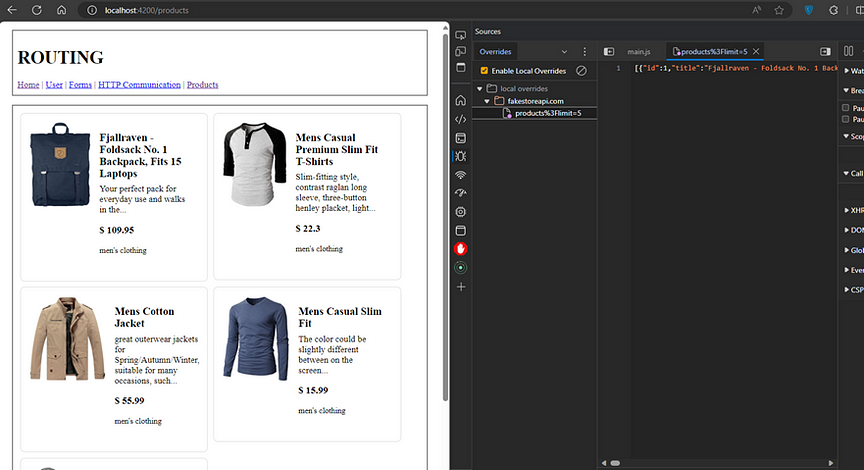
6. Now, you can replace the content of the override file with the response you are expecting to test. Same as before we will add the brand to the first element and will add 10 elements. After that hit CTRL + S to save the changes:
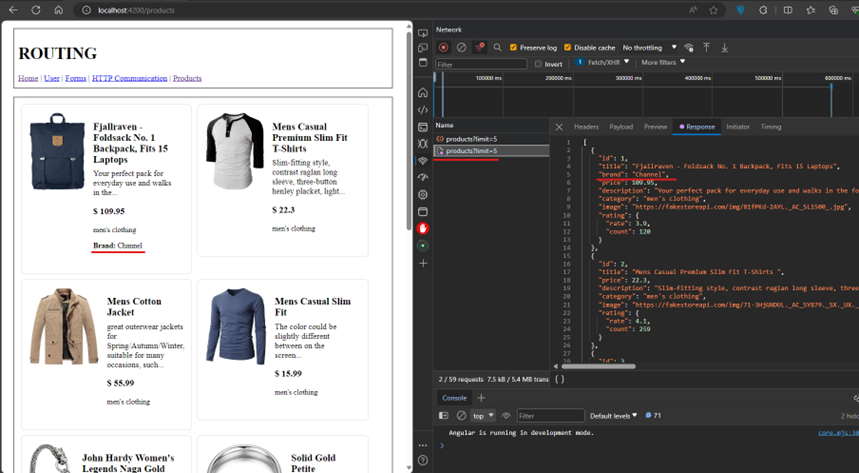
7. Now refresh the page and you will see the response payload overridden by your own and the elements reflected in the application, the first product now shows the brand, there are more than 5 elements (the default limit was also overridden), and in the network tab you will notice that the override is taking place if we see the icon with light purple dot:
Considerations
- If your request is getting a CORS error, the Override content option will be disabled. In that case, you could use the Tweak extension, and in the response code use 0 for the original request.
- If the response payload has fields whose values change every time you request the same endpoint with the same parameters, the Tweak extension may not intercept that request. In that case, you could use the Local Overrides option to mock your response.
Conclusion
Both options discussed offer valuable features for testing different scenarios in front-end development. However, each has its strengths and limitations. The first option provides a powerful alternative to mock scenarios in the browser with a simple configuration and replication of scenarios. On the other hand, the local overrides provide a straightforward approach for simulating custom responses without the need for external tools.
Combining both options can provide a comprehensive testing solution, leveraging the strengths of each to cover a wider range of scenarios effectively. By carefully considering the features offered by each option and their respective advantages, developers can tailor their approach to suit the specific testing needs of their front-end applications.
That’s all! Hope this helps with your frontend projects and saves some time testing several scenarios without touching the backend.